

Jetpack Compose is the new Android's modern toolkit for building beautiful and robust UI at a mind-blowing pace. Designing UI with Jetpack Compose follows a declarative and intuitive approach, which means you simply describe to the framework what you want, while it takes care of the rest in drawing the UI. The interesting thing about Jetpack Compose is that it requires Kotlin, so you should have added that to your skillset before proceeding.
For this article, we'd set up Jetpack Compose 1.2.1, just to give you a quick hands-on experience of it.
First, download and install the latest version of Android Studio. If you have the Artic Fox version or newer version of Android studio also, that would suffice.
Starting a new project
Start by opening your Android Studio, click create new project (if you don't have a project already open), if you already have a project open, click File > New > New project
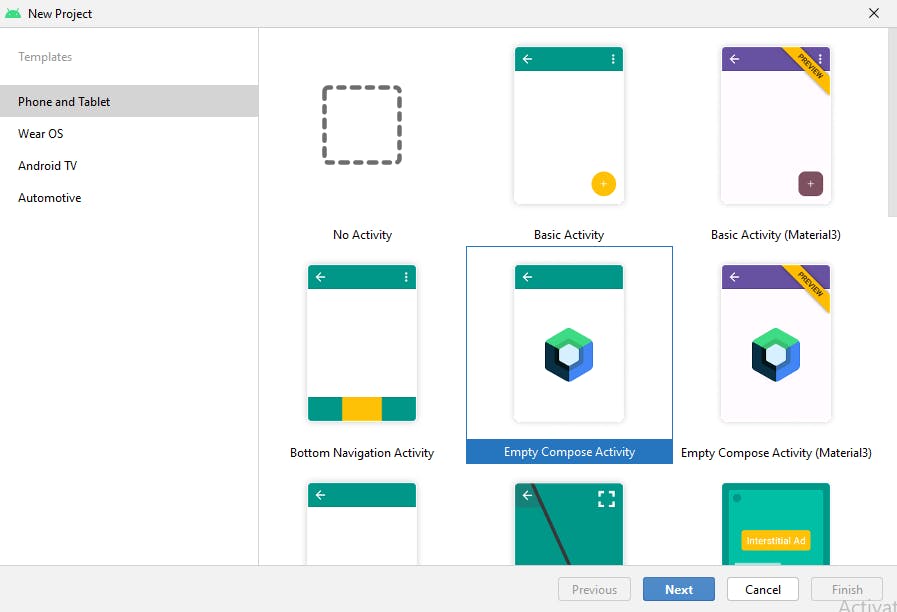
From the screen , select Empty compose activity and click Next.
If you notice, from the minimum SDK selection pane, the least is API 21 (Android 5.0). Yea, that's the minimum API level required to use Jetpack Compose. If your app needs to support a lower Android version, you may want to consider going the good old XML way.
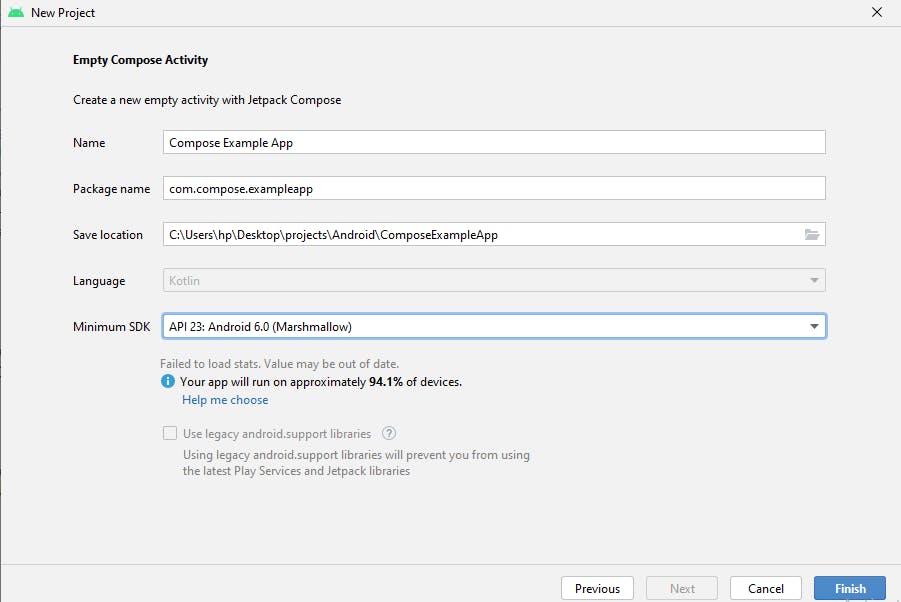
Enter your app name and package name click finish and wait for Android Studio to finish setting up your project.
Configure your gradle version.
Open the gradle-wrapper.properties file, which can be found inside the gradle > wrapper folder and make sure it looks similar to this. We are using gradle version 7.3.3
distributionBase=GRADLE_USER_HOME
distributionUrl=https\://services.gradle.org/distributions/gradle-7.3.3-bin.zip
distributionPath=wrapper/dists
zipStorePath=wrapper/dists
zipStoreBase=GRADLE_USER_HOME
Specifying Compose and Compose compiler version
For the sake of this article, we will use the latest stable version of Compose ( 1.2.1 ), So before you sync your project with gradle, open the project level build.gradle file and make sure you have the a similar setup as this:
buildscript {
    ext {
        compose_version = '1.2.1'
        compose_compiler_version = '1.3.0'
    }

}// Top-level build file where you can add configuration options common to all sub-projects/modules.
plugins {
    id 'com.android.application' version '7.2.0' apply false
    id 'com.android.library' version '7.2.0' apply false
    id 'org.jetbrains.kotlin.android' version '1.7.10' apply false
}

task clean(type: Delete) {
    delete rootProject.buildDir
}
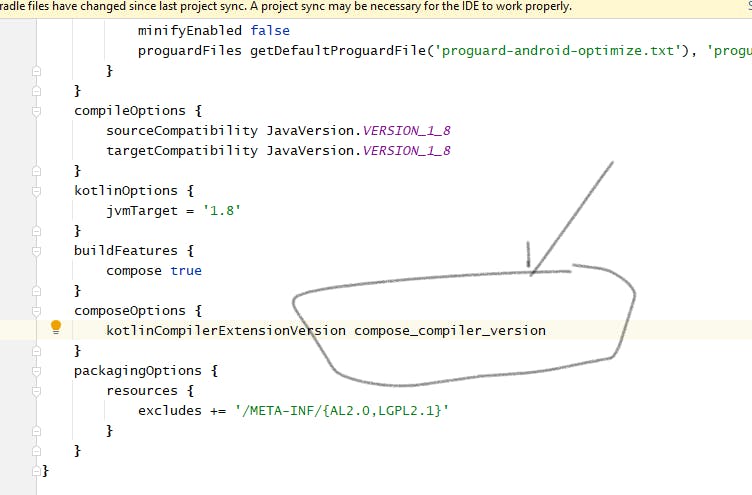
In the app level build.gradle file, change the compose compiler version to what we have specified in the project level build.gradle file.
Kotlin and SDK build tools version
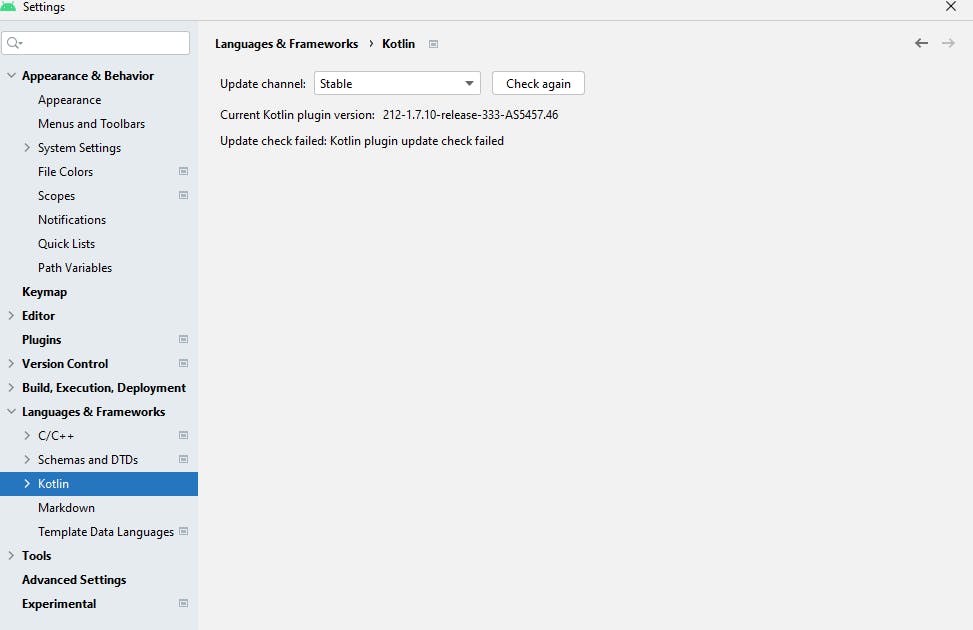
Notice we are also using the latest version of the Kotlin version, if you don't have it, simply go to your Android studio, Select File > Settings > Languages & Frameworks > Kotlin and update to the latest stable Kotlin version.
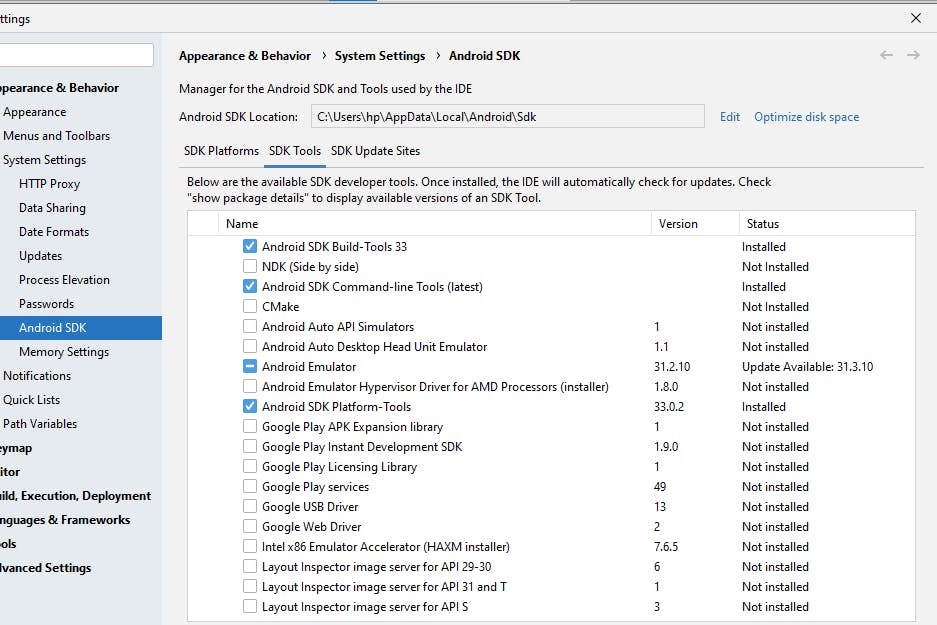
Also, we will use the latest SDK build tools version (33.0.0). In your Android Studio, go to Tools > SDK Manager and select SDK tools, select the Android SDK Build-Tools 33 shown, click apply and wait to finish downloading.
In your app level build.gradle, add the line below to specify the build tools version.buildToolsVersion "33.0.0"

Syncing and building
Now sync the project with gradle and allow it to complete.

Yay! we just finished setting up the latest version of Jetpack Compose and ready to build.
Connect your emulator or debug device and build. For this tutorial, we will use a physical device. So enable debug mode from the developer options of your android device and connect it to your computer with a USB cable. Android studio should automatically detect and show your device.
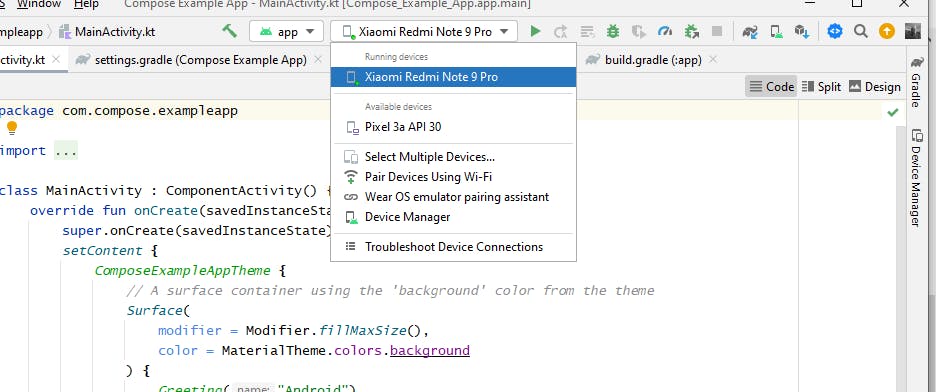
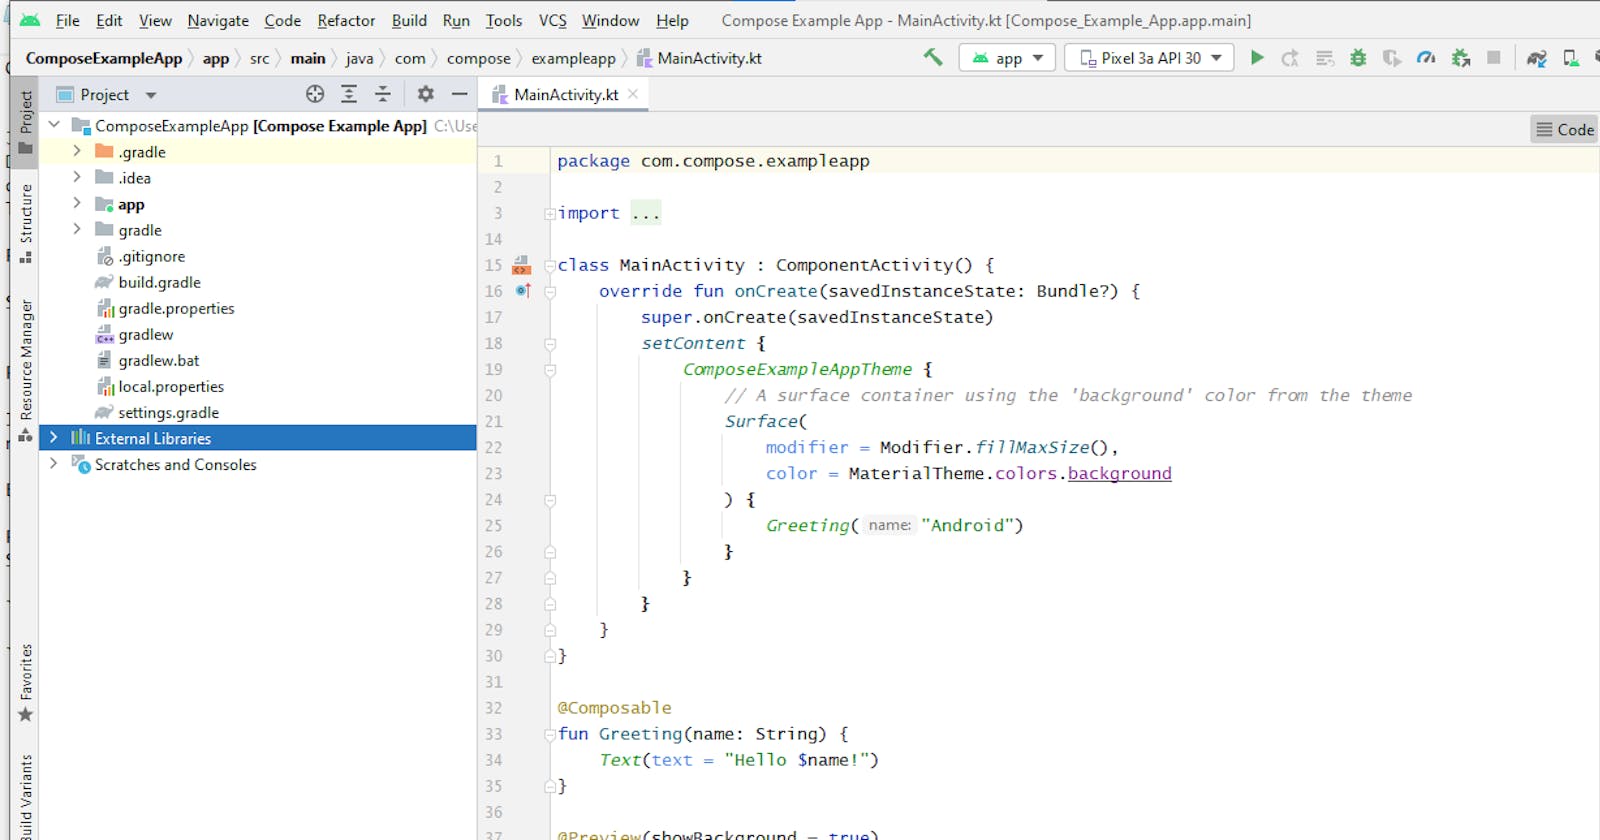
Click the run button and wait for it to finish compiling the project and install on your device, and show the screen with text "Hello Android".

Congratulations, we made it!
Check out the basic project repo on GitHub by clicking this link
In the next tutorial, we will look at the basics of Jetpack Compose.